

Building a Bluetooth-Controlled Robot Using Intelli Bot
Introduction
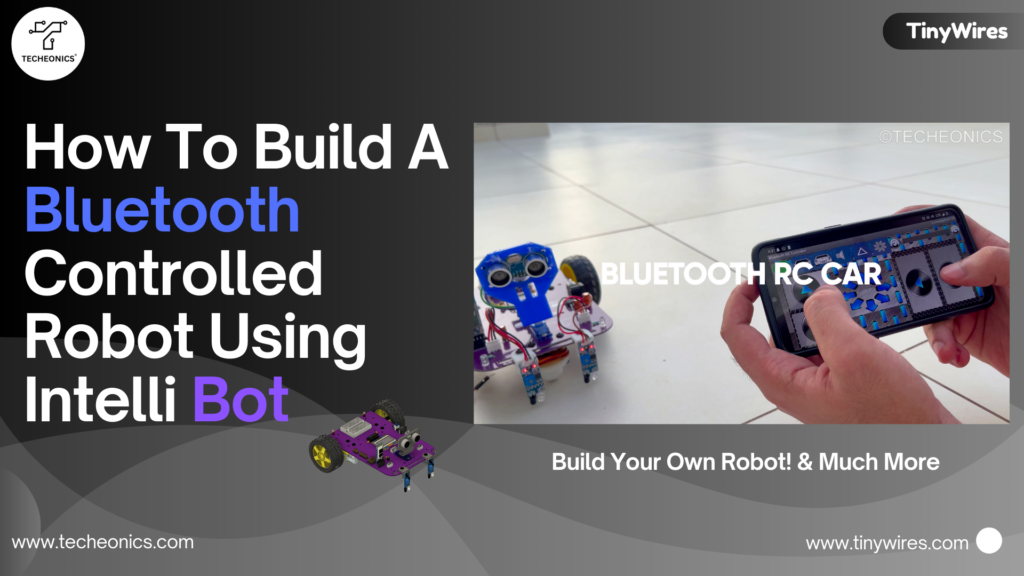
Robotics is an exciting field that merges mechanics, electronics, and programming to create autonomous machines. In this blog post, we’ll walk you through building a Bluetooth-controlled robot using the Intelli Bot V1 DIY Robotics Kit, featuring an Arduino Nano and an HC-05 Bluetooth module. This project is perfect for hobbyists and beginners eager to explore wireless communication with microcontrollers and enhance their robotics skills.
Components Required
- Arduino Nano (included in the IntelliBot V1 kit)
- HC-05 Bluetooth Module
- Motors and Motor Driver (pre-included in IntelliBot V1)
- 18650 3.7V Lithium-Ion Cells (for power supply)
- Wiring and connectors (provided in the kit)
Understanding the Working Principle
A Bluetooth-controlled robot operates using wireless communication between the robot and a mobile device (like a smartphone or tablet). The commands are sent via Bluetooth to the Arduino Nano, which controls the motors and directs the robot’s movements. For this project, we’ll use the HC-05 Bluetooth module to receive the commands, while the motors are driven by the Arduino Nano based on these instructions.
Wiring the Electronics
Before programming the Arduino Nano, we need to set up the hardware components. Here’s a step-by-step guide to wiring your robot:
1. HC-05 Bluetooth Module
- Insert the HC-05 Bluetooth module into the Bluetooth port on the IntelliBot PCB.
2. Arduino Nano
- Insert the Arduino Nano into the designated port on the PCB.
3. Motors
- Mount the motors securely onto the PCB.
- Connect the motor cables to the motor ports (Motor 1 and Motor 2) on the PCB.
4. Power Supply
- Insert two 18650 3.7V lithium-ion cells into the battery holder on the PCB to power the robot.
Programming the Arduino Nano
With the wiring complete, the next step is to program the Arduino Nano to control the robot based on Bluetooth commands. Below is a sample code that enables forward, backward, left, and right movements, as well as controls the front and back lights of the robot.
We’ll use the IntelliBot_v1 library, which simplifies controlling motors and sensors by providing pre-built functions like motor movements (forward(), left(), right(), etc.).
Note- Always Remove/Disconnect the HC-05 Bluetooth Model for Arduino Before Uploading the Code
Arduino Code for Bluetooth-Controlled Robot
#include <IntelliBot_v1.h>
#define Frontlight 13 // Front light connected to pin 13
#define Backlight 12 // Back light connected to pin 12

// Create instances of Motors
Motors myMotors;

char command; // Variable to store the received command

void setup() {
  // Initialize the motors
  myMotors.init();
  pinMode(Frontlight, OUTPUT);
  pinMode(Backlight, OUTPUT);

  // Initialize serial communication for Bluetooth
  Serial.begin(9600);
}

void loop() {
  // Check if any data is available to read from the Bluetooth module
  if (Serial.available() > 0) {
    command = Serial.read(); // Read the incoming command

    // Execute commands based on the received data
    switch (command) {
      case 'F': // Move forward
        myMotors.forward();
        break;
      case 'B': // Move backward
        myMotors.backward();
        break;
      case 'L': // Turn left
        myMotors.left();
        break;
      case 'R': // Turn right
        myMotors.right();
        break;
      case 'S': // Stop or brake
        myMotors.brake();
        break;

      case 'W': // Turn front light on
        digitalWrite(Frontlight, HIGH);
        break;
      case 'w': // Turn front light off
        digitalWrite(Frontlight, LOW);
        break;
      case 'U': // Turn back light on
        digitalWrite(Backlight, HIGH);
        break;
      case 'u': // Turn back light off
        digitalWrite(Backlight, LOW);
        break;

      default:
        // If an unrecognized command is received, stop the robot
        myMotors.brake();
        break;
    }
  }
}
Testing and Calibration
After uploading the code to the Arduino Nano, it’s time to test your robot. Follow these steps:
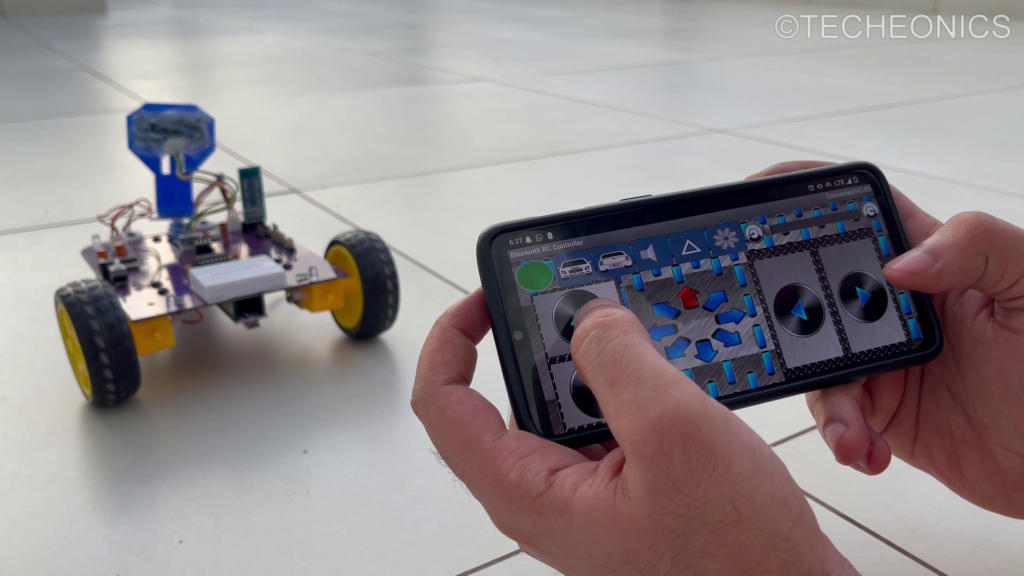
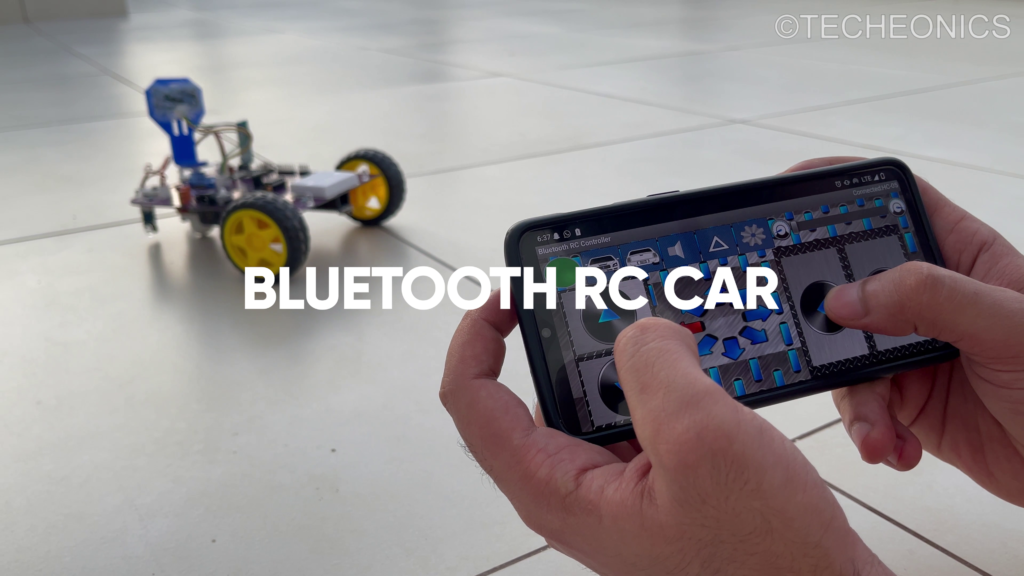
- Pair the Bluetooth Module: Use your smartphone or tablet to connect to the HC-05 Bluetooth module.
- Control the Robot: Download and install the “RC Bluetooth Car” app from the Play Store. Use the app to send commands like ‘F’ (forward), ‘B’ (backward), ‘L’ (left), ‘R’ (right), ‘S’ (stop), and control the lights with ‘W’ and ‘U’.
Precautions
To ensure a smooth experience, here are some precautions to follow:
- Secure Connections: Double-check that all wiring and components are securely connected to avoid issues with movement or signal reception.
- Correct Pin Assignments: Verify that the pins used for the motors and lights are connected correctly to prevent malfunction or damage to the robot.
- Battery Safety: Ensure the 18650 lithium-ion cells are inserted correctly and avoid overcharging to maintain safe operation.
Conclusion
Building a Bluetooth-controlled robot using the IntelliBot V1 DIY Robotics Kit is an exciting and educational project. It not only teaches you the basics of robotics but also introduces wireless communication with Bluetooth, opening the door to more advanced robotics applications. With this guide, you’ll have a fully functioning robot in no time!
Happy building!
External Links
- Official IntelliBot Kit Overview
- Download IntelliBot_v1 Library
- Setup Library in Arduino IDE
- Line-Following Robot Using IntelliBot