

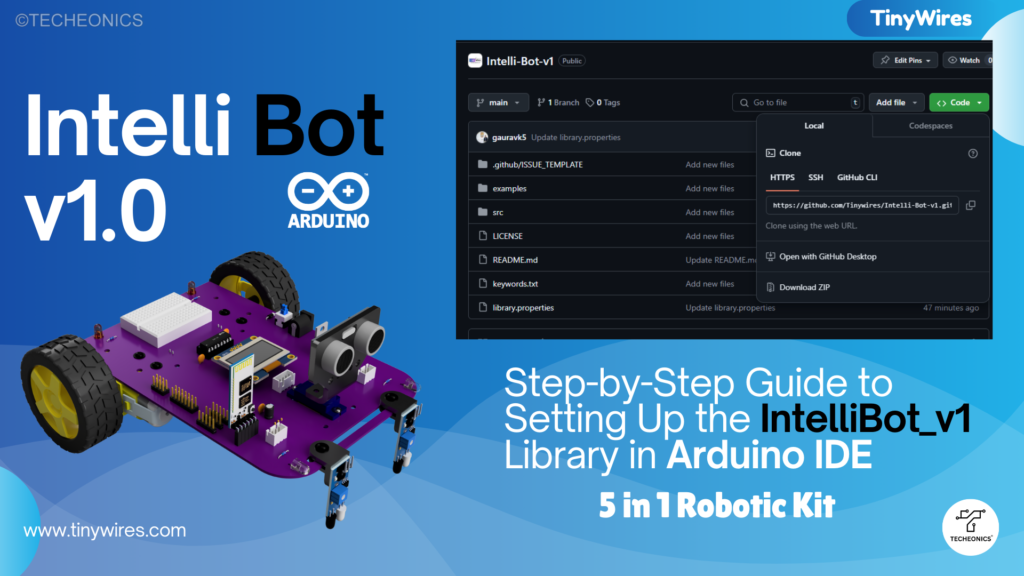
Guide to Setting Up the IntelliBot_v1 Library in Arduino IDE
Introduction
If you’re working with the IntelliBot V1 DIY Robotics Kit, you’re in for a hands-on, interactive experience. One of the first steps to getting started with your IntelliBot is setting up the IntelliBot_v1 library in the Arduino IDE. This custom library makes it incredibly easy to control the motors, sensors, and other components of your robot without having to worry about defining pins or writing complex code. This guide will walk you through the process of downloading, installing, and using the IntelliBot_v1 library step by step.
Step 1: Downloading the IntelliBot_v1 Library
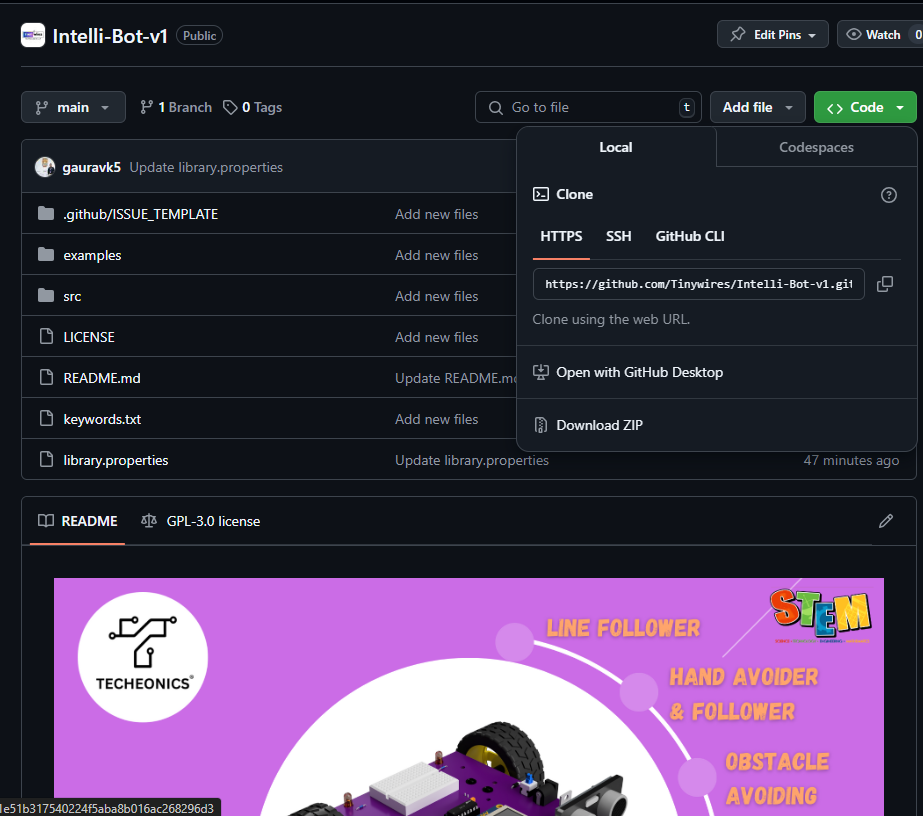
The IntelliBot_v1 library is a custom library designed to work specifically with the IntelliBot kit, pre-assigning pins and simplifying coding with built-in functions. To start, you’ll need to download the library from its GitHub repository:
- Visit the official GitHub repository for IntelliBot_v1.
- Click on the green “Code” button and select “Download ZIP”.
- Save the ZIP file to your computer, making sure you know its location.
Step 2: Installing the Library in Arduino IDE
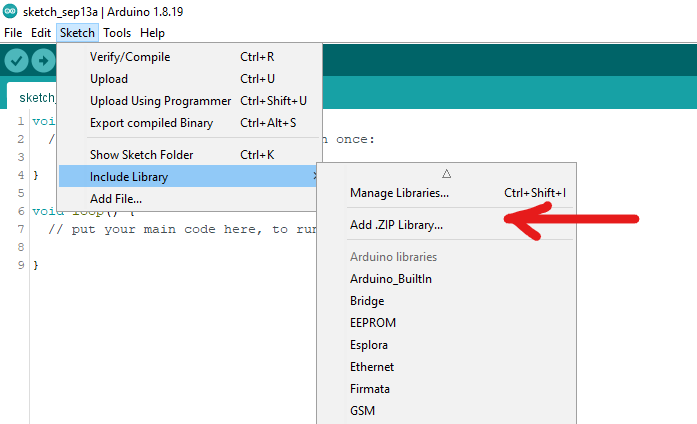
After downloading the IntelliBot_v1 library, the next step is to install it in the Arduino IDE. Follow these simple steps to import the library:
- Open your Arduino IDE.
- In the top menu, go to Sketch > Include Library > Add .ZIP Library….
- Navigate to the location where you saved the downloaded IntelliBot_v1.zip file and select it.
- Once the ZIP is selected, the Arduino IDE will automatically install the IntelliBot_v1 library. You’ll now be able to use it in any of your sketches.
Step 3: Including the IntelliBot_v1 Library in Your Sketch
Now that the library is installed, you need to include it in your Arduino sketch. This allows you to access all the pre-built functions that the IntelliBot_v1 library provides.
At the top of your sketch, include the following line of code:
#include <IntelliBot_v1.h>
This line ensures that the IntelliBot library and its functions are available for use in your project.
Example Code
Here’s a simple example of controlling the motors:
#include <IntelliBot_v1.h>

Motors myMotors;

void setup() {
  myMotors.init();
}

void loop() {
  myMotors.forward();
  delay(2000);
  myMotors.brake();
  delay(1000);
  myMotors.fastLeft();
  delay(1000);
}
In this example:
- The robot moves forward for 2 seconds.
- It stops for 1 second.
- Then, it makes a fast left turn for 1 second.
Step 4: Exploring Example Sketches
To help you get started, the IntelliBot library comes with pre-built example sketches. These examples show how to use the different functionalities of the IntelliBot, such as controlling motors, using sensors, and more.
To access these examples:
- In the Arduino IDE, go to File > Examples.
- Scroll down and look for IntelliBot_v1.
- You’ll find examples like:
- Bluetooth: For controlling the robot via Bluetooth (ideal for RC control robots).
- Ultrasonic_Sensor: For obstacle avoidance robots using ultrasonic sensors.
- IR Sensor: For building a line follower robot.
- Motor Example: Demonstrates how to control the motors using IntelliBot’s simplified motor control functions.
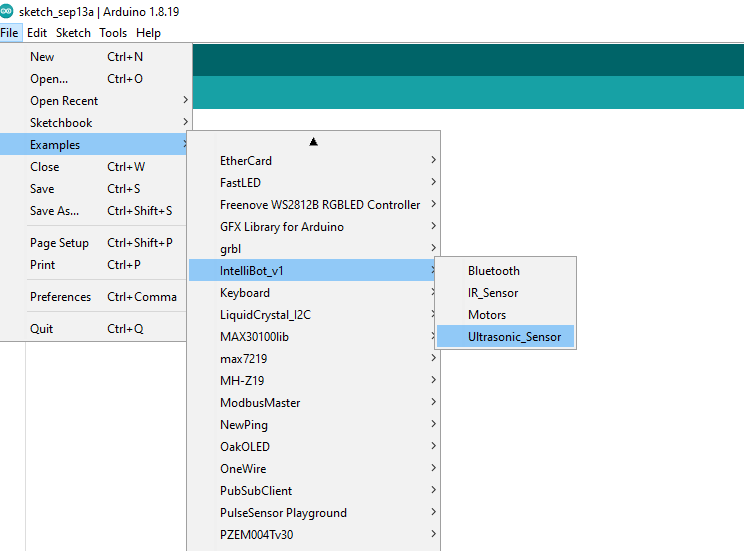
These examples are an excellent starting point for your Intelli Bot projects, and they can be easily customized to suit your specific needs.
Step 5: Benefits of Using the IntelliBot_v1 Library
The IntelliBot_v1 library is designed with ease of use in mind, particularly for beginners or hobbyists. Here are some key benefits:
1. Predefined Pin Configurations
You don’t need to manually define or assign pins for motors or sensors. The library is configured for the IntelliBot’s hardware, saving you from wiring or coding errors.
For example, the motor pins are predefined in the library like this:
#define MOTOR_PIN1 5
#define MOTOR_PIN2 6
This eliminates the need for you to manually set these up, making coding faster and more efficient.
2. Simplified Motor Control Functions
No need to write complex motor control loops. The library provides straightforward functions such as:
myMotors.forward();      // Moves the robot forward
myMotors.backward();     // Moves the robot backward
myMotors.fastLeft();     // Turns the robot left
myMotors.fastRight();    // Turns the robot right
These functions allow you to control your robot’s movement without needing to handle low-level motor logic.
3. Built-in Sensor Functions
Handling sensors like IR and ultrasonic sensors is also simplified. The IntelliBot_v1 library has functions for reading data from sensors and making decisions based on that data.
For more information on the IntelliBot kit, check out the product overview here.
Conclusion
The IntelliBot_v1 library is your gateway to programming the IntelliBot kit with ease and efficiency. From predefined pin setups to built-in motor and sensor functions, the library saves you time and effort, allowing you to focus on building and experimenting with your robot. With this setup guide, you’re now ready to dive into the world of robotics using the IntelliBot kit and the Arduino IDE.