

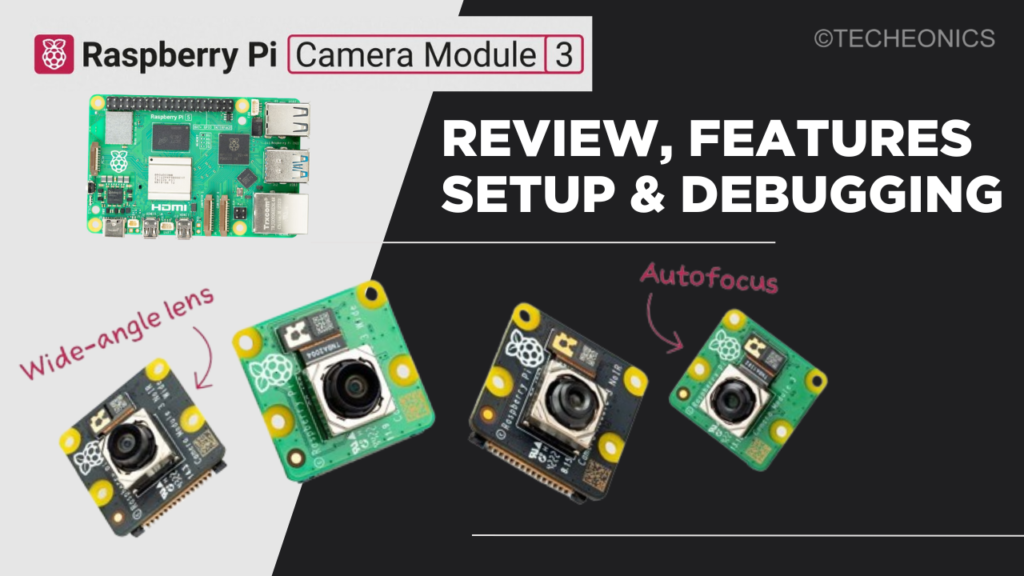
Raspberry Pi Camera Module 3 : Setup, Review, and Troubleshooting Guide
In this blog, we’ll dive into the Raspberry Pi Camera Module 3, covering everything from a thorough review and setup instructions to troubleshooting common issues. We’ll also explore the commands to operate the camera via the command line and provide a simple Python script to get you started with capturing photos.
Introduction
The Raspberry Pi Camera Module 3 is a versatile and powerful addition to the Raspberry Pi ecosystem. Whether you’re a hobbyist looking to explore photography and video recording or a professional needing a compact and affordable camera for your projects, this module has something to offer. In this guide, we’ll walk you through the ins and outs of Camera Module 3, compare it with other variants, provide a detailed setup process, and help you troubleshoot common issues.
Review of the Raspberry Pi Camera Module 3
From the physical footprint standpoint, the new Pi Camera Module V3 is almost identical to previous revisions except for the pointy lens, which comes in 2 flavors.
The biggest upgrade is the new 12MP sensor (from Sony IMX708) capable of 4608×2592 which is very close to the pixel count of the Raspberry Pi HQ Camera with the added benefit of phase shift autofocus – the tech previously available only on 3rd parties cameras like Arducam.
The Raspberry Pi Camera Module 3 brings several improvements over its predecessors. It features:
- Improved resolution: With higher resolution capabilities, it delivers sharper images and video.
- Enhanced low-light performance: Better performance in low-light conditions makes it suitable for a wider range of applications.
- Variety of lenses: Available in standard, wide-angle, and NoIR (No Infrared) variants, offering flexibility based on your project needs.
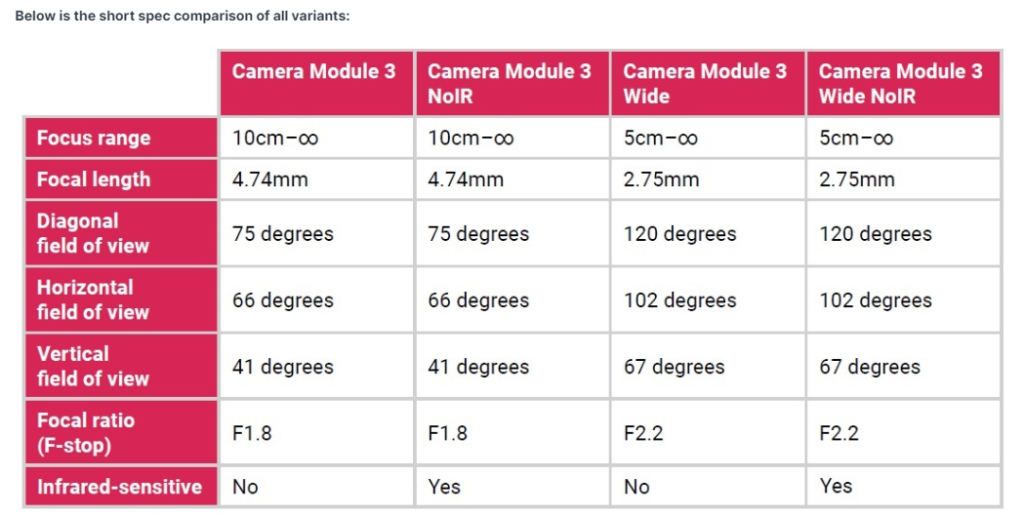
Specification

Variants of the Raspberry Pi Camera Module 3
There are four versions of the Raspberry Pi Camera Module 3:
- Standard Version: The basic model is suitable for general photography and video recording.
- Wide-Angle Version: Provides a broader field of view, ideal for capturing wide scenes.
- NoIR Version: Lacks an infrared filter, making it perfect for night-time photography and surveillance.
- Wide-Angle NoIR Version: Combines the benefits of a wide-angle lens and NoIR capabilities, making it versatile for various lighting conditions.
Setting Up the Raspberry Pi Camera Module 3
Hardware Setup
- Connect the Camera:
- Power off your Raspberry Pi.
- Locate the camera port (next to the HDMI port).
- Gently lift the plastic cover on the camera port.
- Insert the camera module’s ribbon cable with the metal connectors facing away from the HDMI port.
- Push the plastic cover back down to secure the cable.
Software Setup
- Update Your Raspberry Pi OS: Open the terminal and run:
sudo apt-get update sudo apt-get upgrade - Enable the Camera Interface: Use
raspi-configto enable the camera =sudo raspi-configNavigate toInterfacing Options->Camera->Enable, then reboot your Raspberry Pi. - Install Camera Software:
sudo apt-get install libcamera-apps
Using the Camera via Command Line
Older Commands
Before the introduction of libcamera, the Raspberry Pi used the following commands to access the camera:
- Capture Image:
raspistill -o image.jpg - Record Video:
raspivid -t 10000 -o video.h264
New Commands
With the new libcamera interface, here are the updated commands:
- Check Camera:
libcamera-hello - View Camera Feed:
libcamera-hello -t 0 - Capture Image:
libcamera-jpeg -o test.jpg - Capture Image with Specific Size:
libcamera-jpeg -o test1080.jpg -t 5000 --width 1920 --height 1080 - Record Video:
libcamera-vid -t 10000 -o test.h264
Using Python to Access the Camera
Here’s a simple Python script to capture an image using the camera module:
Python Code
- Install Required Libraries:
sudo apt-get install python3-libcamera - Python Script:
from picamera2 import Picamera2
picam2 = Picamera2()
picam2.start()
picam2.capture_file("image.jpg")
Running the Script
Save the script as capture_image.py and run it:
python3 capture_image.py
Troubleshooting Common Issues
Camera Not Detected
- Check the Ribbon Cable: Ensure the ribbon cable is properly connected to both the camera module and the Raspberry Pi.
- Enable the Camera in raspi-config: Revisit the
raspi-configsettings to ensure the camera interface is enabled. - Update and Upgrade: Make sure your system is fully updated:bashCopy code
sudo apt-get update sudo apt-get upgrade
Camera Not Working After OS Update
If the camera stops working after an OS update, you might need to add or update configurations in the config.txt file.
- Edit config.txt: Open the file with a text editor:
sudo nano /boot/config.txt - Add Camera Parameters: Go to the bottom of the file and add the following lines to ensure the camera works correctly:
camera_auto_detect=0 dtoverlay=imx708 - Reboot the System:
sudo reboot
Check out the Video for More
Conclusion
The Raspberry Pi Camera Module 3 is a remarkable tool for anyone interested in computer vision A and other camera-related projects. With this guide, you should be well-equipped to set up, use, and troubleshoot your camera module. Whether you’re a beginner or an experienced user, the Camera Module 3 offers a wide range of capabilities to explore.
For further reading, check out Raspberry Pi Documentation. If you encounter any issues not covered in this guide, the Raspberry Pi forums are a great place to seek help from the community. Also, don’t miss out on our video tutorial on YouTube for a visual guide.