

LoRa RFM95W-868S2R Module 868Mz

LoRaWAN (Long Range Wide Area Network) is a specification for a telecommunication network suitable for long-distance communication with little power. The technology is used for machine-to-machine communication (Internet of Things).
The architecture consists of gateways, network servers and application servers. There are RF chips from Semtech used to transmit a spread spectrum.
More information about LoRaWAN can be found at:
Build LoRa node using Arduino Uno and HopeRF RFM95 LoRa transceiver module
Hardware used
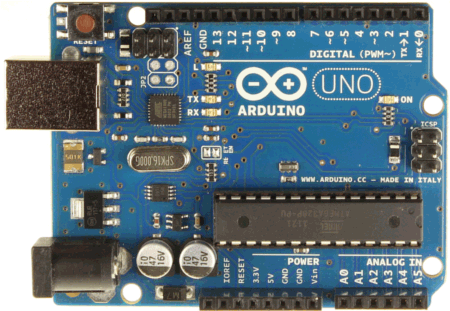
Arduino Uno
The HopeRF RFM95 LoRa transceiver module is marked RF96 which means the chip is using the SX1276 chip. The RFM95 and RFM95W are the same.
W=CE/FCC version for worldwide, without W=internal Chinese market only.
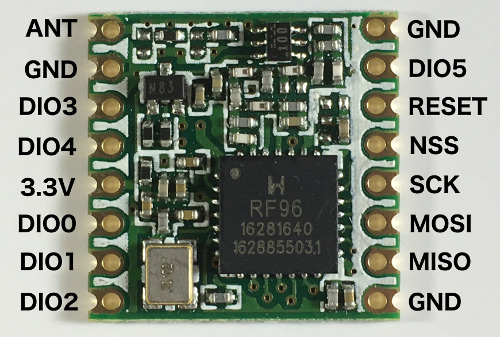
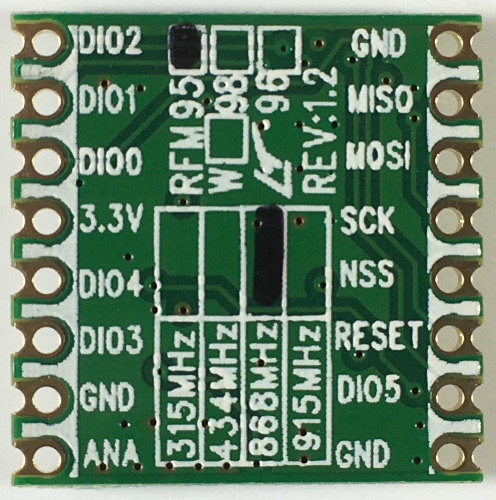
Bottom view. The frequency used in Europe is 868 MHz, for North America 915 MHz and for Asia 433 MHz. Make sure your HopeRF RFM95 LoRa transceiver module has the correct frequency.
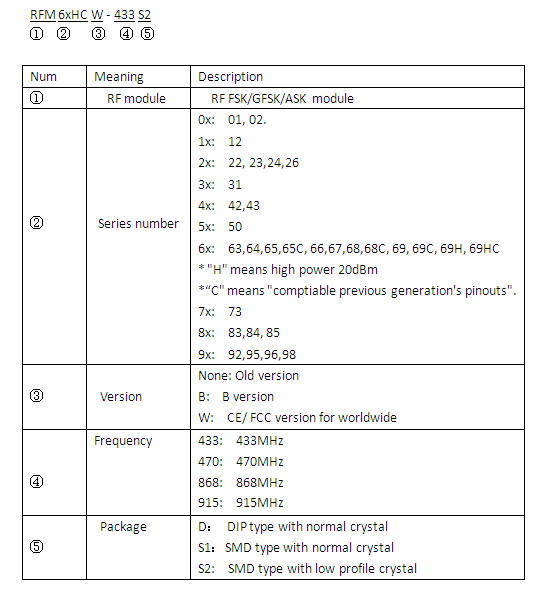
HopeRF naming rules, see: http://www.hoperf.com/faqs/410.html
More information about the HopeRF RFM95(W) LoRa transceiver module:
ESP8266 module adapter plate.

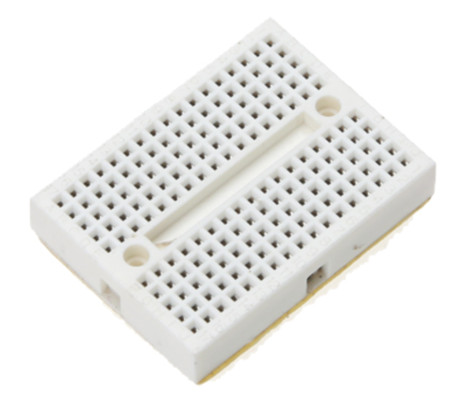
Solderless breadboard SYB-170
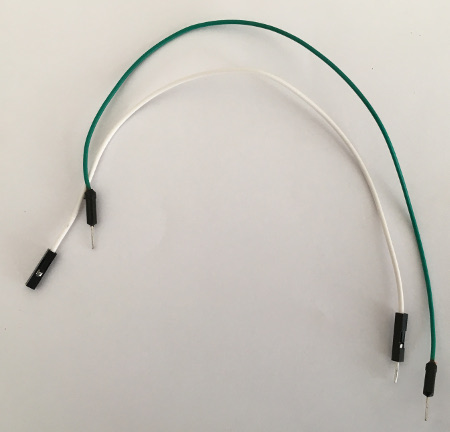
Jumper wires 20 cm long (6x male-male and 3x male-female)
Breakable male pin headers (1 strip with 8 pins and 1 strip with 7 pins)

USB 2.0 cable type A/B

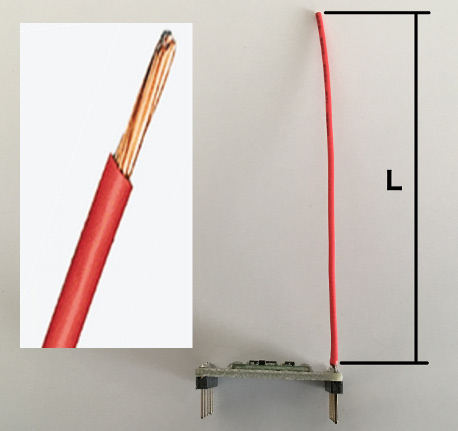
Insulated stranded copper wire 30AWG (conductor diameter = 0.254 mm).
The wire will be used as an antenna.
The wire must have a length (L) of:173 mm (f = 433 MHz, for Asia)86 mm (f = 868 MHz, for Europe)82 mm (f = 915 MHz, for North America)
The antenna length (L) is calculated as follow:
c = λ x f
L = ¼ x λ
c = speed of light = 299792458 m/s
λ = wavelength (m)
f = frequency = 868000000 Hz (This frequency applies to Europe)
L = antenna length (m)
299792458 = λ x 868000000
λ = 0.34538 m
λ = 345.38 mm
L = ¼ x λ = 86 mm (This antenna applies for Europe)
Software prerequisites
none
ProcedureCreate a LoRa node, part 1: HopeRF RFM95 LoRa transceiver module v1.2
Create a LoRa node, part 2: Prepare the module adapter plate
Create a LoRa node, part 3: Solder the LoRa module on the adapter plate
Create a LoRa node, part 4: Attach the antenna to the LoRa module
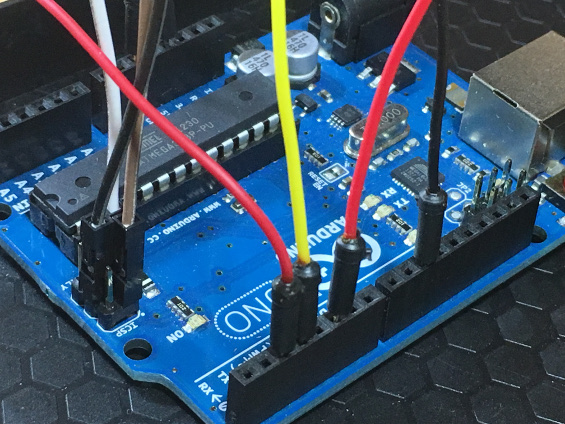
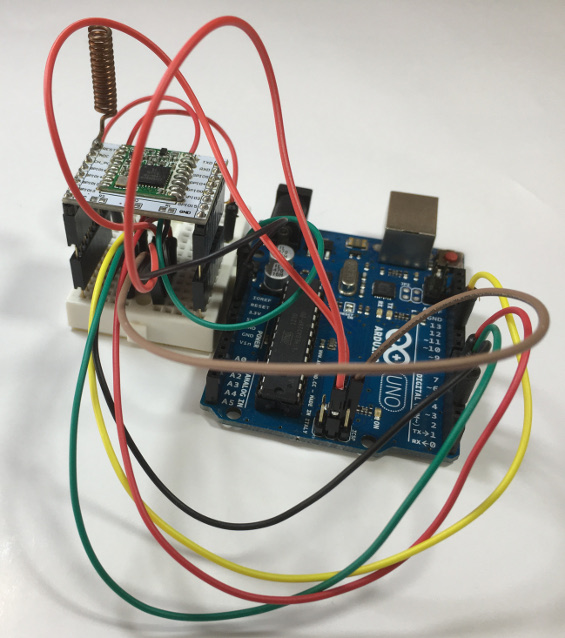
Make the following jumper wire connections between the HopeRF RFM95 LoRa transceiver module and the Arduino Uno (R3).
HopeRF RFM95 LoRa transceiver moduleArduino Uno Pin HopeRF RFM95 LoRa transceiver moduleArduino Uno PinANT- GND-GNDGND DIO5-DIO3- RESET5DIO4- NSS103.3V3.3V SCK13DIO02 MOSI11DIO13 MISO12DIO2- GND-
ANT = Antenna
GND = Ground
DIO = Digital Input/Output
NSS = Slave Select
SCK = Serial Clock (output from master)
MOSI = Master Out Slave In (data output from master)
MISO = Master In Slave Out (data output from slave)
Note:
Attach wire antenna to ANT pin.The HopeRF RFM95 LoRa transceiver module has 3 GND pins. It does not matter which GND pin you use. Use at least one.Do not use DIO2The Arduino Uno uses SPI (Serial Peripheral Interface) to communicate with the LoRa transceiver module. The Arduino Uno is the Master and the LoRa transceiver module is the Slave.
Wiring HopeRF RFM95 LoRa transceiver module and Arduino Uno (R3).
Schematics


Instead of using two breadboards (MB-102 and SYB-170), you can make it more compact by using only the mini breadboard (SYB-170) and 4x 8pin headers.
Installing the LoRa Library
There are several libraries available to easily send and receive LoRa packets with the ESP32. In this example we’ll be using the arduino-LoRa library by sandeep mistry.
Open your Arduino IDE, and go to Sketch > Include Library > Manage Libraries and search for “LoRa“. Select the LoRa library highlighted in the figure below, and install it.

CODE
https://github.com/gauravk5/LoRa-RFM95W-868S2R-Module-868Mz/